


1. ls
The ls command lists the content of a folder, including files and directories. Here’s the syntax:
ls [options] [directory_or_path]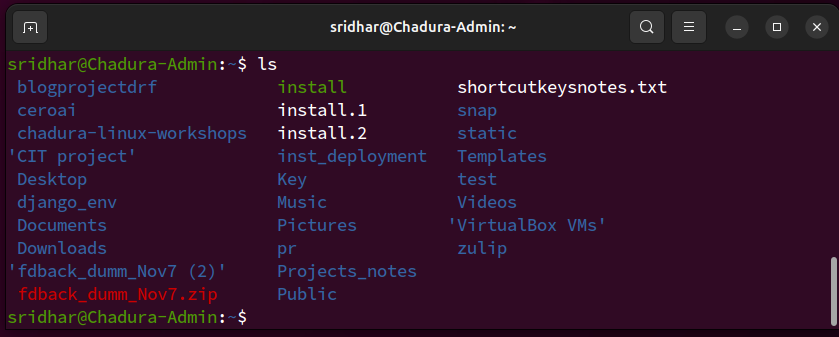
If you omit the path, the ls command will check the content of your current directory. To list items inside subfolders, add the -R option. Meanwhile, use -a to show hidden content.
2. Pwd
To check the full path of your current working directory, use the pwd command. Its syntax is as follows:
pwd [options]The pwd command has only two options. The -L option prints environment variable content, like shortcuts, instead of the actual path of your current location. Meanwhile, -P outputs the exact location.
For example,
/shortcut/folder is a shortcut for /actual/path, and you are currently in /actual/path/dir.If you use the -L option, the output will be:
/shortcut/folder/dirMeanwhile, the -P option will print the exact canonical path:
/actual/path/dir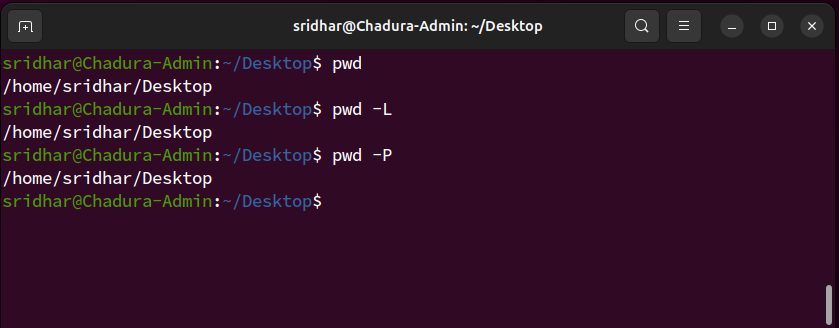
3. Cd
Use cd to navigate between directories in your Linux system. It doesn’t have any option, and the syntax is simple:
cd [path_or_directory]Depending on your location, you might only need to specify the parent directory. For example, omit path from path/to/directory if you are already inside one. The cd command has several shortcuts:
- cd - returns to the current user’s home directory.
- cd .. - moves a directory up.
- cd - - goes back to the previous directory.
4. mkdir
The mkdir command lets you create one or multiple directories. The syntax looks like this:
mkdir directory_name1 directory_name2To create a folder in another location, specify the full path. Otherwise, this command will make the new item in your current working directory.
For example,
enter the following to create a new_folder in /path/to/target_folder
mkdir path/to/target_folder/new_folder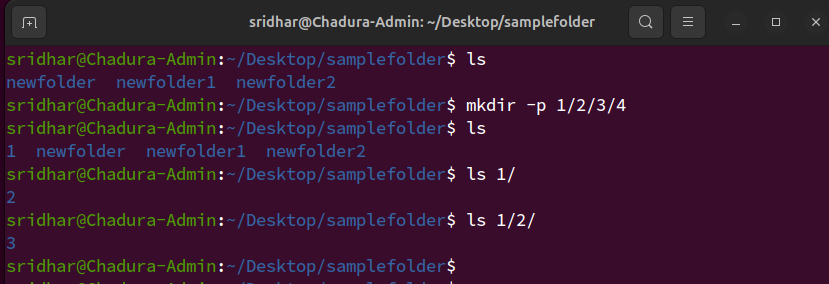
By default, mkdir allows the current user to read, write, and execute files in the new folder. You can set custom privileges during the creation by adding the -m option.
5. rmdir
Run rmdir to delete empty directories in your Linux system. The command syntax looks like this:
rmdir [options] directory_name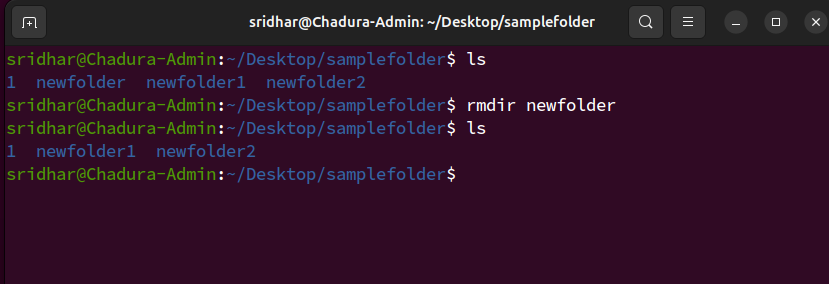
The rmdir command won’t work if the directory contains subfolders. To force the deletion, add the - p option. Note that you must own the item you want to remove or use sudo instead.
6. rm
The rm command deletes files from a directory. You must have the write permission for the folder or use sudo. Here’s the syntax:
rm [options] file1 file2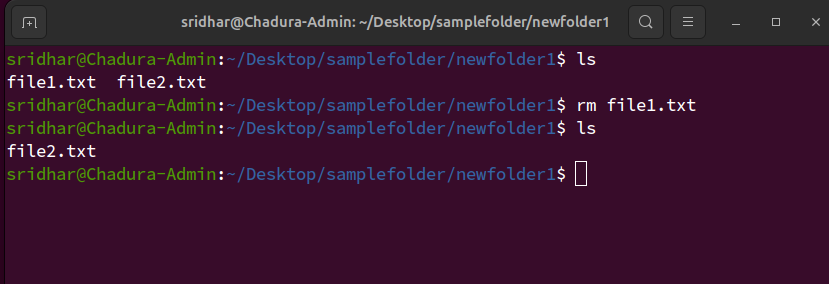
You can add the -r option to remove a folder and its contents, including subdirectories. Use the -i flag to display a confirmation message before the removal or -f to deactivate it completely.
Warning! Avoid using -r and -f unless necessary. Instead, add -i option to prevent accidental deletion.
7. cp
Use the cp command to copy files from your current directory to another folder. The syntax looks like this:
cp file1 file2 [target_path]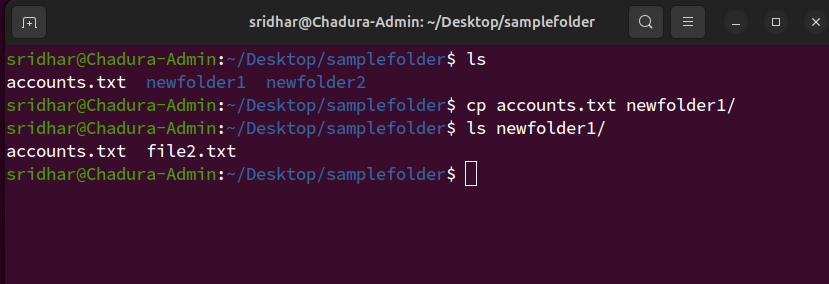
You can also use cp to duplicate the content of one file to another using this syntax. If the target is in another location, specify the full path like so:
cp source_file /path/to/target_fileAdditionally, cp lets you duplicate a directory and its content to another folder using the -R option:
cp -R /path/to/folder /target/path/to/folder_copy8. mv
The main usage of the mv command is to move a file or folder to another location. Here’s the syntax:
mv file_or_directory [target_directory]For example, we will move file1.txt from another location to the /new/file/directory path using this command:
mv /original/path/file1.txt the/target/pathYou can also use the mv command to rename files in your Linux system. Here’s an example:
mv old_name.txt new_name.txtIf you specify the full path, you can simultaneously rename files and move them to a new location like this example:
mv old/location/of/old_name.txt new/path/for/new_name.txt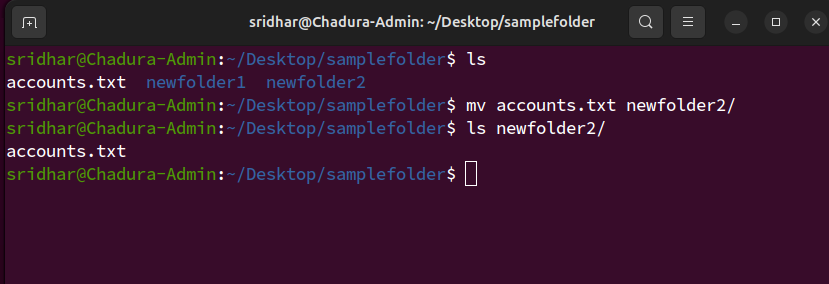
9. touch
Run the touch command to create a new empty file in a specific directory. The syntax is as follows:
touch [options] [path_and_file_name]If you omit the path, the touch command will create a new file in your current working directory. Here’s an example:
touch file.txt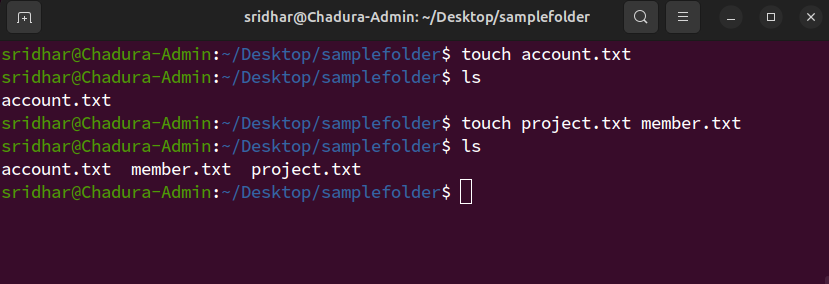
10. file
The file command checks a file type, such as TXT, PDF, or other. The syntax is as follows:
file [file_name]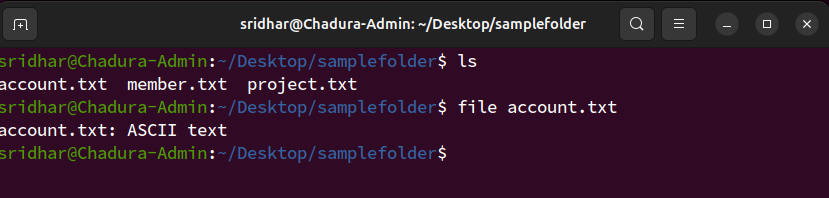
If you use this command on a symbolic link, it will output the actual file connected to the shortcut. You can add the -k option to print more detailed information about the item.
11.zip and unzip
The zip command compresses one or multiple files into a ZIP archive, reducing their size. Here’s the syntax:
zip [options] zip_file_name file1 file2unzip
To extract a compressed file into your current working directory, use the unzip command like so:
unzip [options] zip_file_name12. tar
The tar command bundles multiple files or directories into an archive without compression. The syntax looks as follows:
tar [options] tar_file_name file1 file2To create a new TAR file, you must add the -c option. Then, use the -f flag to specify the archive’s name.
If you want to enable compression, add a specific option based on your preferred method. For example, the following will bundle file1.txt and file2.txt with the gzip compression:
tar -cfz archive.tar.gz fle1.txt file2.txtRemember that the archive’s file format will differ depending on the compression method. Regardless of the extension, you can unpack a TAR file using this syntax:
ar [options] tar_file_name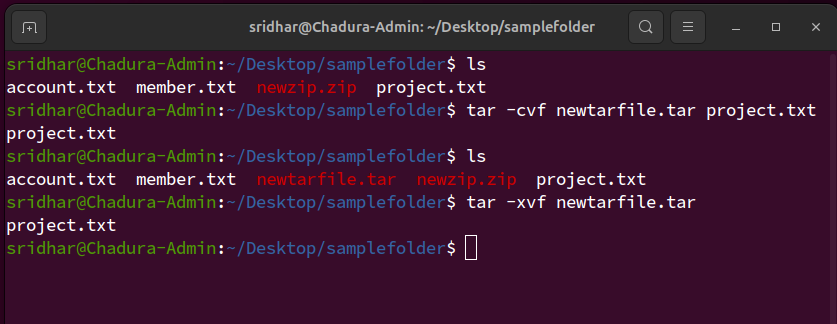
13. nano, vi, and jed
nano, vi, and jed commands let you edit files. They have the same syntax, except at the beginning, where you specify the name of the tool:
nano/vi/jed file_name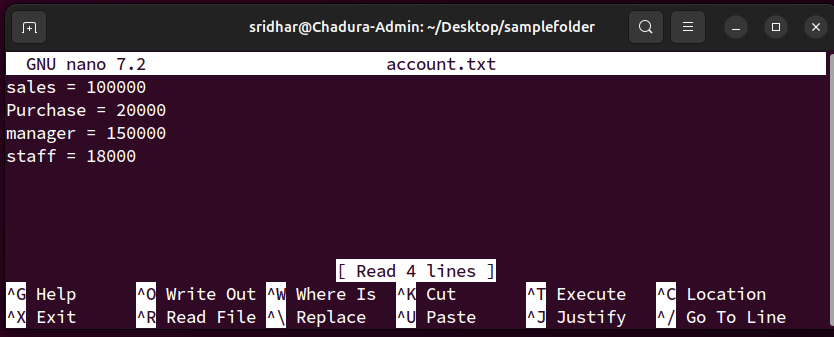
If the target file doesn’t exist, these commands will create a new one. Since your system might not have these text processing utilities pre-installed, configure them using your package manager. We will explain the command in the apt and dnf command section.
14. cat
The concatenate or cat command has various usages. The most basic one is printing the content of a file. Here’s the syntax:
cat file_nameTo print the content in reverse order, use tac instead. If you add the standard output operator symbol (>), the cat command will create a new file. For example, the following will make file.txt:
cat > file.txtYou can also use cat with the operator to combine the content of multiple files into a new item. In this command, file1.txt and file2.txt will merge into target.txt:
cat file1.txt file2.txt > target.txt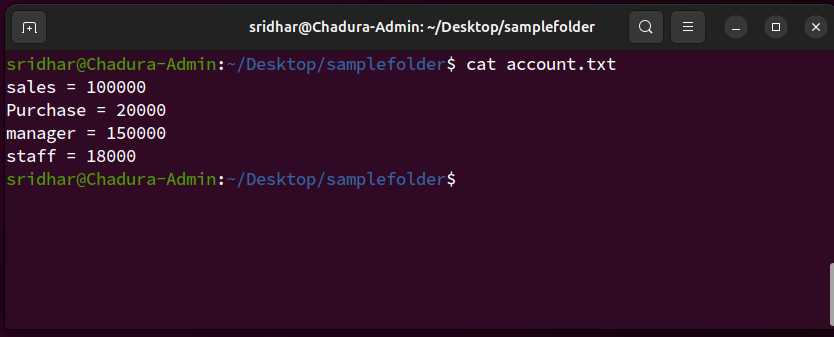
15. grep
Global regular expression print or grep lets you search specific lines from a file using keywords. It is useful for filtering large data like logs. The syntax looks as follows:
grep [options] keyword [file] / ls | grep "file.txt"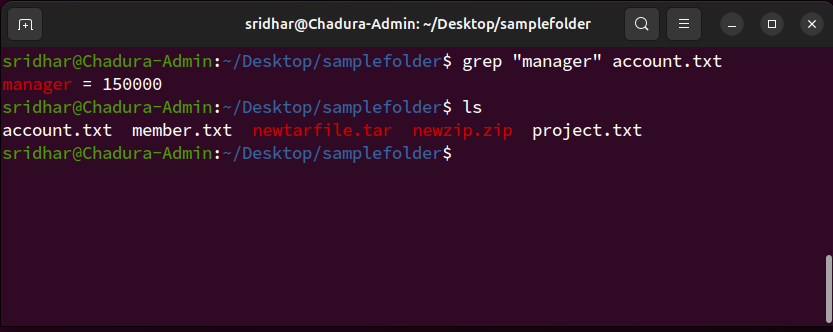
You can also filter data from another utility by piping it to the grep command. For example, the following searches file.txt from the ls command’s output:
16. Sed
Use the sed command to search and replace patterns in files quickly. The basic syntax looks like this:
sed [options] 'subcommand/new_pattern/target_pattern' input_file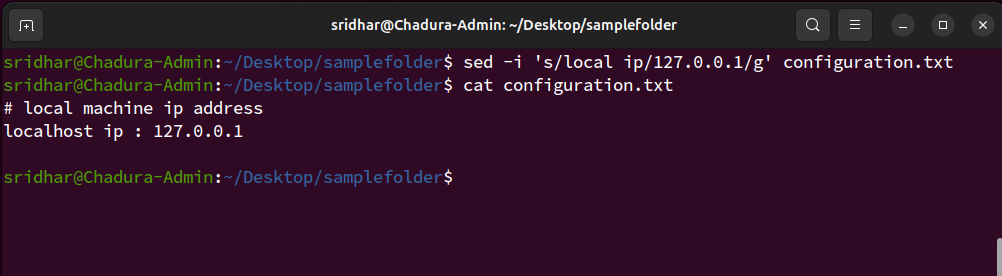
You can replace a string in multiple files simultaneously by listing them. Here’s an example of a sed command that changes red in colors.txt and hue.txt with blue: sed 's/red/blue' colors.txt hue.txt
17. head
Use the head command to print the first few entries of a file. The basic syntax is as follows:
head [options] file_nameYou can also print the first few lines of another command’s output by piping it like so:
command | head [options]By default, the head will show the first ten lines. However, you can change this setting using the -n option followed by your desired number.Meanwhile, use -c to print the first few entries based on the byte size instead of the line.
18. tail
The tail command is the opposite of the head, allowing you to print the last few lines from files or another utility’s output. Here are the syntaxes:
tail [options] file_name command | tail [options]The tail utility also has the same option as head. For example, we will extract the last five lines from the ping command’s output:
`ping -c 10 8.8.8.8 | tail -n 5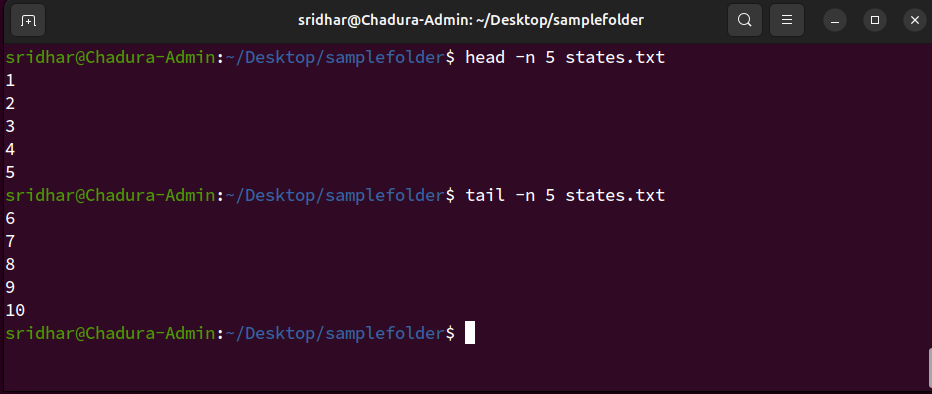
19. awk
The awk command searches and manipulates regular expression patterns in a file. Here’s the basic syntax:
awk '/regex pattern/{action}' input_file.txt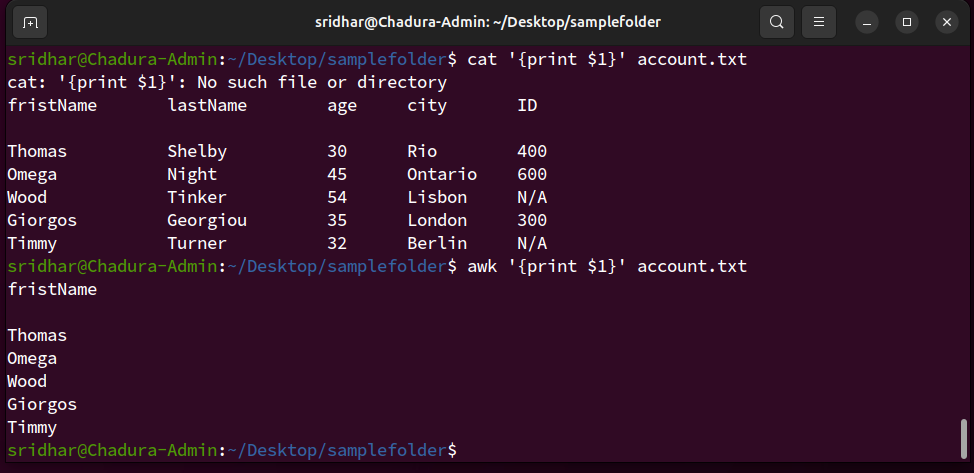
Although similar to sed, awk offers more operations beyond substitution, including printing, mathematical calculation, and deletion. It also lets you run a complex task with an if statement.
You can run multiple actions by listing them according to their execution order, separated by a semicolon (;). For example, this awk command calculates the average student score and print names that are above that threshold:
20. sort
Use the sort command to rearrange a file’s content in a specific order. Its syntax looks as follows:
sort [options] [file_name]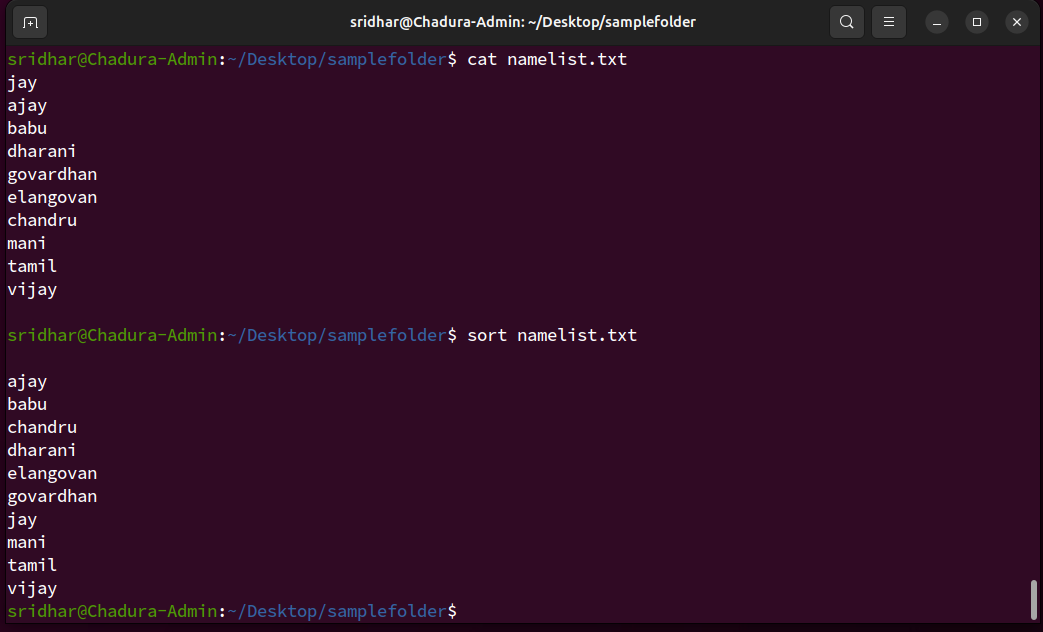
Note that this utility doesn’t modify the actual file and only prints the rearranged content as an output.
By default, the sort command uses the alphabetical order from A to Z, but you can add the -r option to reverse the order. You can also sort files numerically using the -n flag.
21. cut
The cut command selects specific sections from a file and prints them as a Terminal output. The syntax looks like this:
cut <options file>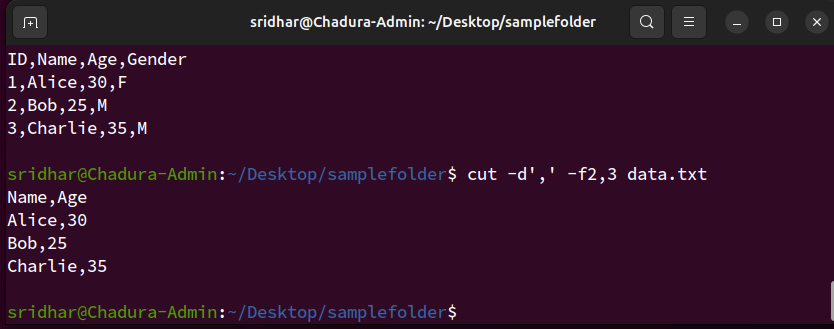
Unlike other utilities, the cut command’s options are mandatory for file sectioning. Here are some of the flags:
-f - selects a specific row field.
-b - cuts the line by a specified byte size.
-c - sections the line using a specified character.
-d - separates lines based on delimiters.
You can combine multiple options for a more specific output. For example, this command extracts the third to fifth field from a comma-separated list:
22. diff
The diff command compares two files and prints their differences. Here’s the syntax:
diff file_name1 file_name2By default, the diff command only shows the differences between the two files. To print all the content and highlight the discrepancies, enable the context format using the -c option. You can also ignore case sensitivity by adding -i.
For example, run the following to show only the differences between 1.txt and 2.txt
diff -c 1.txt 2.txt23. tee
The tee command outputs another command’s results to both the Terminal and a file. It’s helpful if you want to use the data for further processing or backups. Here’s the syntax:
command | tee [options] file_nameIf the specified file doesn’t exist, tee will create it. Be careful when using this command since it will overwrite the existing content. To preserve and append existing data, add the -a option.
For example, we will save the ping command’s output as new entries in the test_network.txt file:
ping 8.8.8.8 | tee -a test_network.txt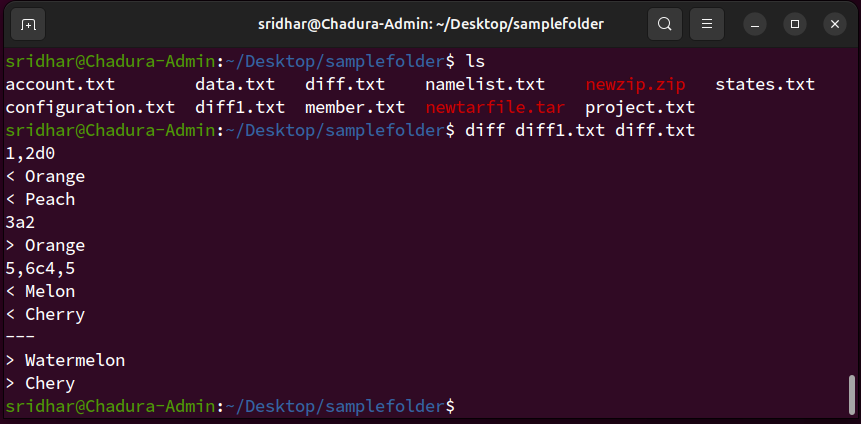
24. locate
The locate command searches for a file and prints its location path. Here’s the syntax:
locate [options] [keyword]
If you use the -r option to search files using regular expressions, omit the [keyword] argument. The locate command is case-sensitive by default, but you can turn off this behavior using the -i flag.
Note that the locate will look for files from its database. While this behavior speeds up the search process, you must wait for the list to refresh before finding newly created items.
25. find
The find command searches for a file within a specific directory. Here’s the syntax:
find [path] [options] expression
If you don’t specify the path, the find command will search your current working directory. To find files using their name, add the -name option followed by the keyword.
You can specify the type of item you are looking for using the -type flag. The - type f option will search files only, while -type d will find directories. For example, we will check file.txt in path/to/folder:
find path/to/folder -type f -name "file"Unlike locate, the find command searches through folders in real time. While it slows down the process, you can look for new items immediately without waiting for the system database to refresh.
26. sudo
superuser do or sudo enables non-root users who are part of the sudo group to execute administrative commands. Simply add it at the beginning of another utility like so:
sudo [options] your_commandFor example, enter the following to open a file using nano as an administrator:
sudo nano file.txtThe Terminal will prompt you to enter the user’s password before executing the command. By default, you must reenter it after five minutes of inactivity.
Typically, you don’t add any option to sudo, but you can check them by entering:
sudo --help27. su and whoami
The su lets you switch to another user in the Terminal session. The syntax looks as follows:
su [options] [username]If you don’t specify any option or username, this command will switch you to the root user. In this case, you must enter the password before changing the account.
You can check the currently logged-in user from the Linux command-line shell. Alternatively, use the whoami command:
whoami
28. chmod
Chmod lets you change the permissions of files or directories. The basic syntax looks as follows:
chmod [options] [permission] [file_or_directory]
In Linux, there are three folder and file permissions - read (r), write (w), and execute (x). You can assign them to three parties - the owner, a group, or other accounts belonging to neither category. Consider this example:
chmod -rwx---r- - file1.txtThe spot after the first hyphen ( - ) specifies the permission for the owner of file1.txt. In the previous example, we grant them the rwx privilege. The next spot is for groups. Since we won’t grant them any privilege, we put three hyphens to indicate emptiness. The last slot is for other users who only have read or r permission.
29. chown
The chown command lets you change the ownership of files, directories, or symbolic links. Here’s the syntax:
chown [options] newowner:newgroup file1 file2If you want to assign a user as the new owner of an item, leave the group name empty. For example, we will make admin-vps the owner of file1.txt:
chown admin-vps file1.txtConversely, omit the username to make all group members the owner. Remember to write the colons (:) like so:
chown :newgroup file1.txt
30. useradd, passwd, and userdel
Use the useradd command to create a new account in your Linux system. The syntax is as follows:
useradd [options] new_usernameBy default, the useradd command doesn’t prompt you to give the new user a password. You can add or change it manually later with the passwd command:
passwd new_username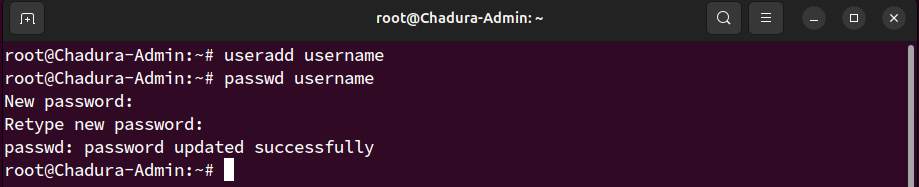
To remove a user, use the userdel command followed by the account name like the syntax in the example:
userdel new_username
Since managing other users requires a superuser privilege, run these commands as root or with the sudo prefix.
31. df
The df command checks your Linux system’s disk usage, displaying the used space in percentage and kilobyte (KB). The syntax looks like this:
df [options] [file system]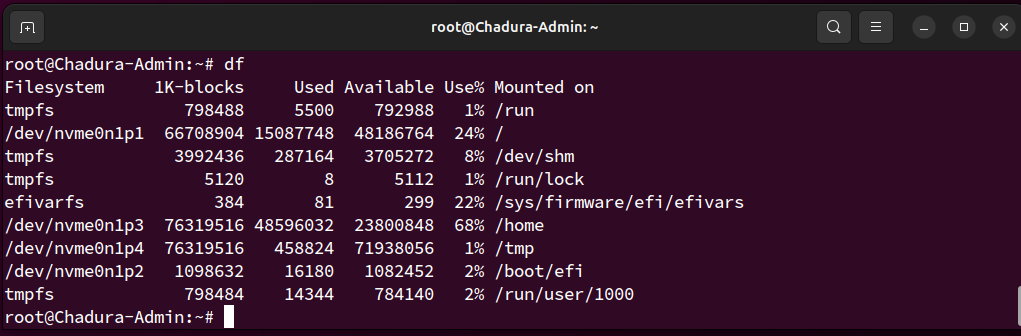
Note that the df command operates at the file system level. If you don’t specify one, the utility will display all the active file systems.
32. du
To check the size of a directory and its content, use the du command. Here’s the syntax:
du [directory]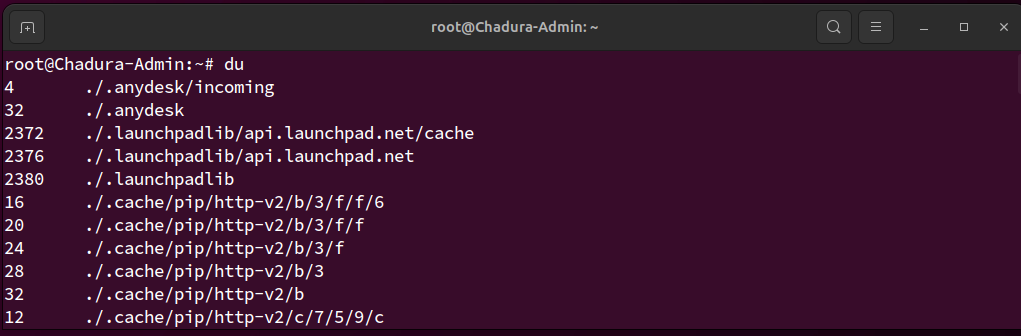
The command will check your working directory if you don’t specify a path or folder. By default, it breaks down each subfolder’s disk usage, but you can add the -s option to summarize the total usage in one output.
You can also use the -M option to change the information from KB to MB.
33. top
The top command displays all running processes in your system and their hardware consumption. The syntax looks like this:
top [options]
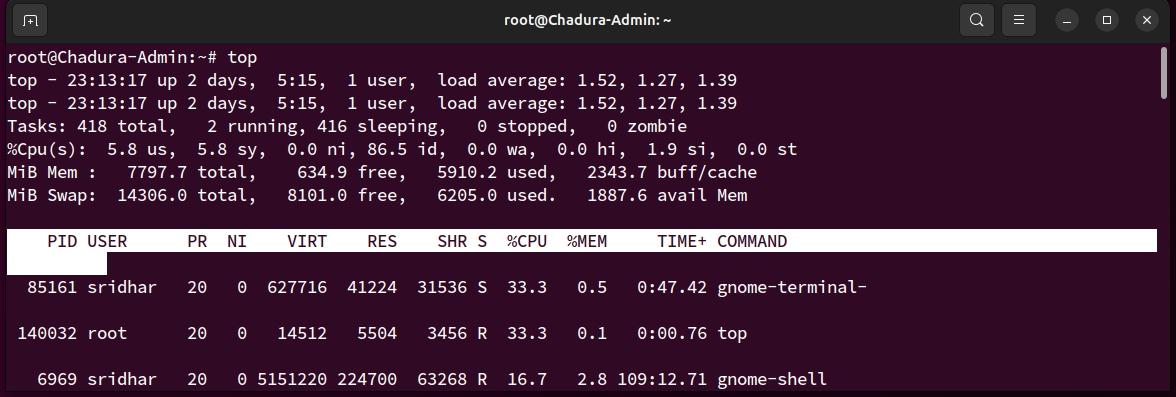
The top command has various options. For example, -p lets you check a specific process by specifying its ID. Meanwhile, add the -d flag to change the delay between screen updates.
34. htop
Like top, the htop command lets you display and manage processes in your Linux server. It also shares the same syntax:
htop [options]
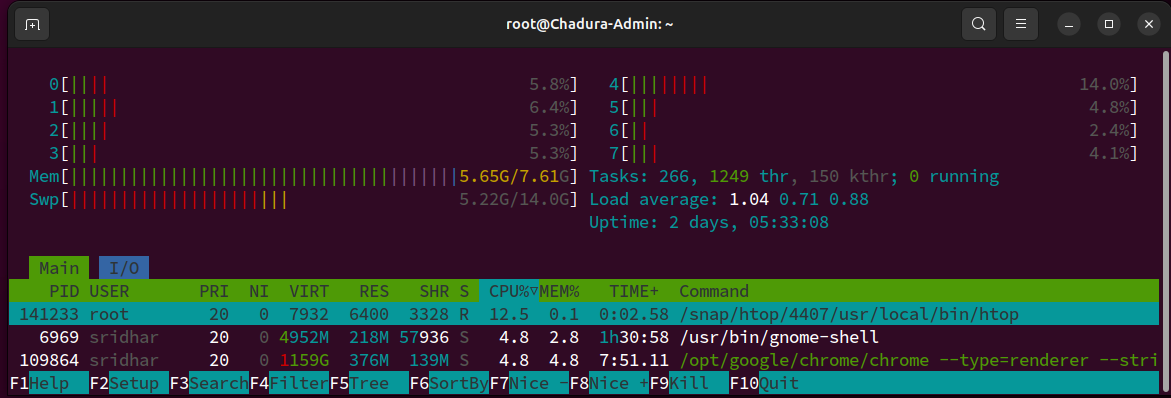
htop has options similar to top, but you can add additional ones. For example, -C enables the monochrome mode, while - -tree shows processes in a hierarchical view.
35. ps
The ps command summarizes the status of all running processes in your Linux system at a specific time. Unlike top and htop, it doesn’t update the information automatically. Here’s the syntax:
ps [options]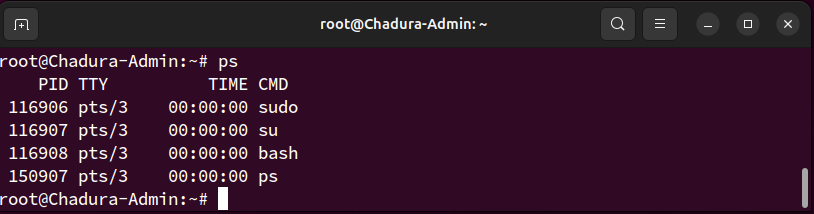
You can print a more detailed report by adding other options. For example, use -A to list all processes in your system, -r to check only the running ones, or -u username to query those associated with a particular account.
36. uname
The unix name or uname command displays detailed information about your Linux machine, including hardware, name, and operating system kernel. Its basic syntax looks as follows:
uname [options]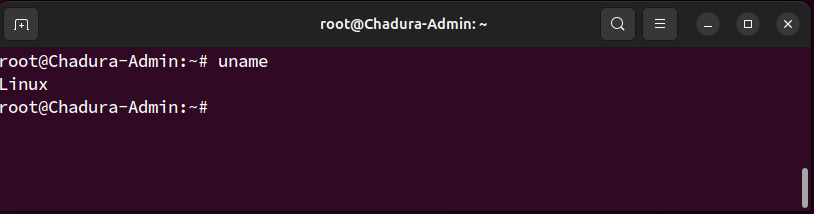
Without any option, the command will print your system’s kernel name. To check all information about your machine, add the -a option.
37. hostname
Use the hostname command to check your hostname and other related information. Here is the syntax:
hostname [options]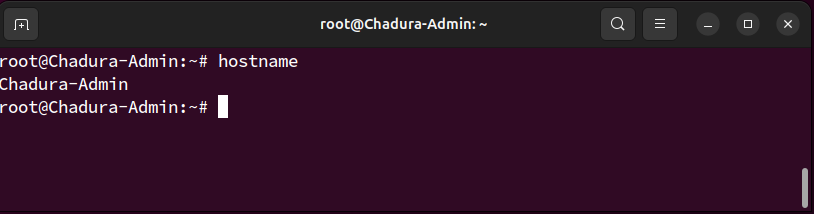
If you leave the option empty, the command will print your hostname. Add -i to check your server’s IP address, -a to print the hostname alias, and -A to output the system’s fully qualified domain name (FQDN).
38. time
The time command measures the execution time of commands or scripts to gain insights into your system performance. The basic syntax looks as follows:
time _or_script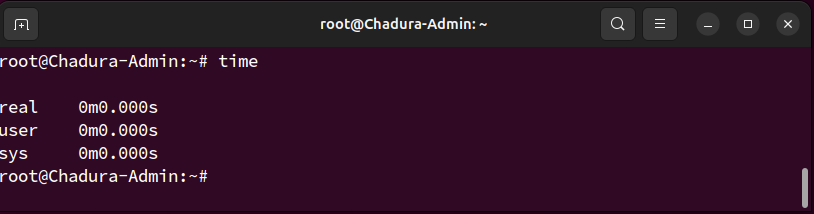
You can measure a series of commands by separating them using double ampersands (&&) or semicolons (;) like so:
time command; command; command
39. systemctl
The systemctl command is used to manage services in your Linux system. Here’s the basic syntax:
systemctl subcommand [service_name][options]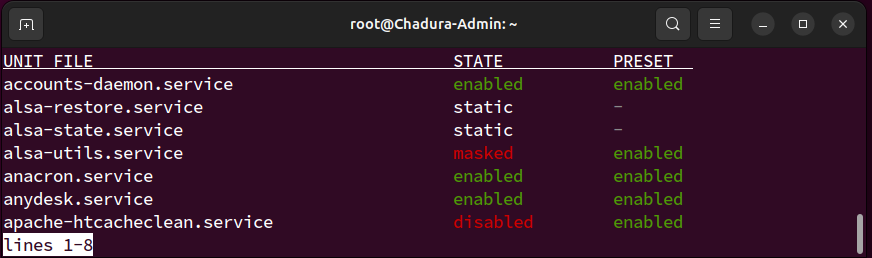
The subcommands represent your task, like listing, restarting, terminating, or enabling the services. For example, we will list Linux services using this:
sudo systemctl list-unit-files --type service --allNote that this command might not work with older distributions since they use
40. watch
The watch command lets you continuously run a utility at a specific interval to monitor changes in the output. Here’s the basic syntax:
watch [options] command_name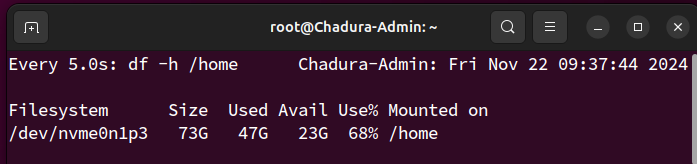
By default, watch will run your command every two seconds, but you can change the interval using the -n option followed by the delay. If you want to highlight changes in the output, add the -d flag.
41. jobs
Jobs are tasks or commands that are running in your current shell. To check them, use the jobs command with the following syntax:
jobs [options] [Job_ID]Running this command without any argument will show all jobs running in the Terminal’s foreground and background. If you don’t have any ongoing tasks, it will return an empty output.
Adding the - l option allows you to display more detailed information about each job. Meanwhile, use - n to show only tasks whose status has changed since the last notification.
42. kill
Use the kill to terminate a process using its ID. Here’s the basic syntax:
kill [signal_option] Process_ID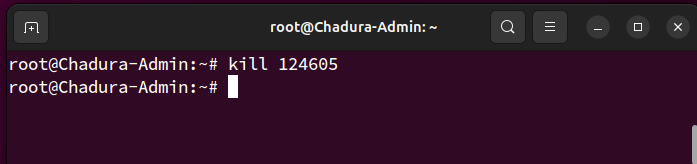
To obtain the process ID, run the following command:
43. shutdown
The shutdown command lets you turn off or restart your Linux system at a specific time. Here’s the syntax:
shutdown [option] [time] [message]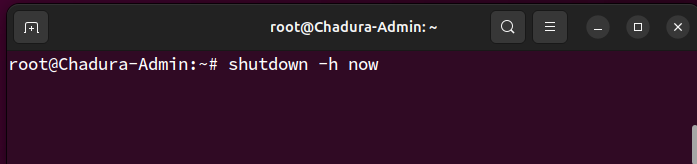
If you run the command without any arguments, your system will shut down immediately. You can specify the schedule using a 24-hour format or a relative one. For example, enter +5 to shut down the system after five minutes. To restart the machine, add the -r option.
The message argument specifies the notification other users in your system will receive before the server shuts down.
44.ping
The ping command sends packets to a target server and fetches the responses. It is helpful for network diagnostics. The basic syntax looks like the following:
ping [option] [hostname_or_IP_address]By default, ping sends infinite packets until the user manually stops it by pressing Ctrl + C.
However, you can specify a custom number using the -c option. You can also change the interval between transfers by adding -i.
For instance, let’s send 15 packets every two seconds to Google’s server:
ping -c 15 -i 2 google.com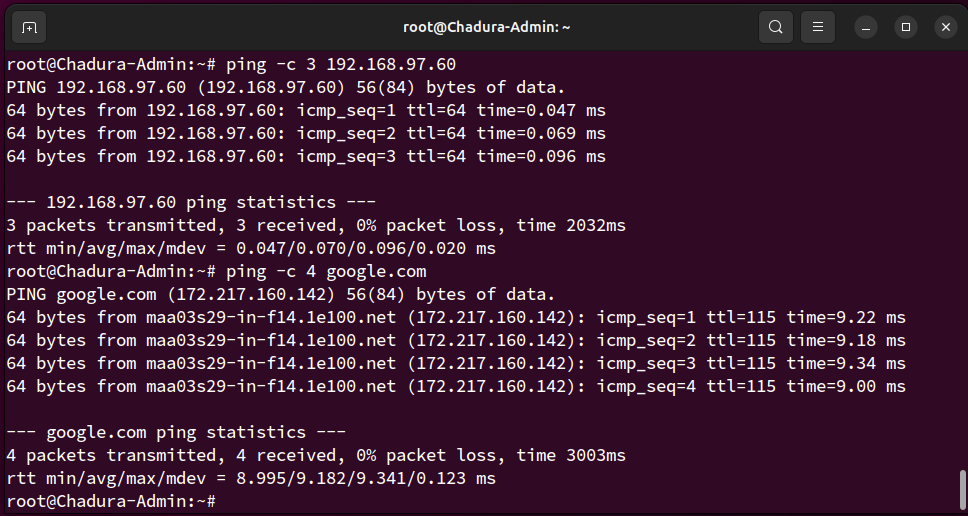
45. wget
The wget command lets you download files from the internet via HTTP, HTTPS, or FTP protocols. Here’s the syntax:
wget [options] [URL]By default, the wget command will download an item to your current working directory. For example, run this command to retrieve the latest WordPress installer:
wget https://wordpress.org/latest.zip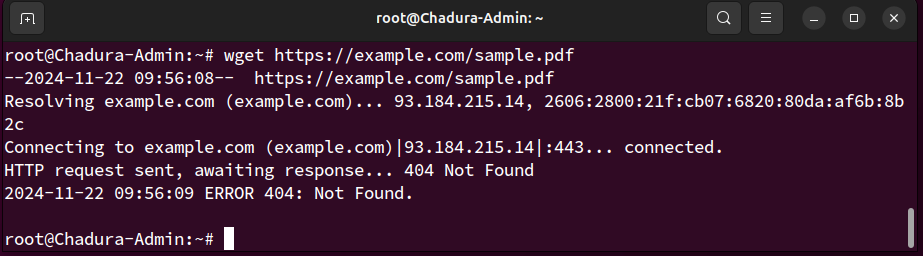
46. cURL
Use the cURL command to transfer data from or to a server by specifying its URL. The basic syntax looks as follows:
curl [options] URLRunning cURL without an option will print the website’s HTML content in your Terminal. If you add the -O or -o option, the command will download files from the specified link.
The cURL command is also helpful for testing API or server endpoints. You can do so by adding the - X option followed by an HTTP method, depending on whether you want to fetch or upload data.
For example, the following command will retrieve data from a specific API endpoint:
curl -X GET https://api.example.com/endpoint
47. scp
The scp command lets you securely copy files and directories between systems over a network. The syntax looks as follows:
Scp [option] [source username@IP]:/[directory and file name] [destination username@IP]:/[destination directory]If you are copying items to or from your local machine, omit the IP and path. When transferring a file or folder from a local machine, specify its name after options.
For example, we will run the following to copy file1.txt to our VPS’ path/to/folder directory as root:
scp file1.txt root@185.185.185.185:path/to/folder
You can change the default SCP port by specifying its number after the -P option. Meanwhile, use the -l flag to limit the transfer bandwidth and add - C to enable compression.
48.rsync
The rsync command syncs files or folders between two destinations to ensure they have the same content. The syntax looks as follows:
rsync [options] source destinationThe source and destination can be a folder within the same system, a local machine, or a remote server. If you are syncing content with a VPS, specify the username and IP address like so:
rsync/path/to/local/folder/ vps-user@185.185.185.185:/path/to/remote/folder/
You can add the -a option to sync the file or folder’s attributes as well, including their symbolic links. Meanwhile, use the -z flag to enable compression during the transfer.
49. ip
The ip utility lets you list and manage your system’s network parameters, similar to the ifconfig command in older Linux distros. Here’s the syntax:
ip [options] object commandRunning this command without any argument will print the manual, including an explanation about acceptable options and objects.
To manage a network parameter, specify the action in the command argument. For example, run this to show your system’s IP address:
ip address show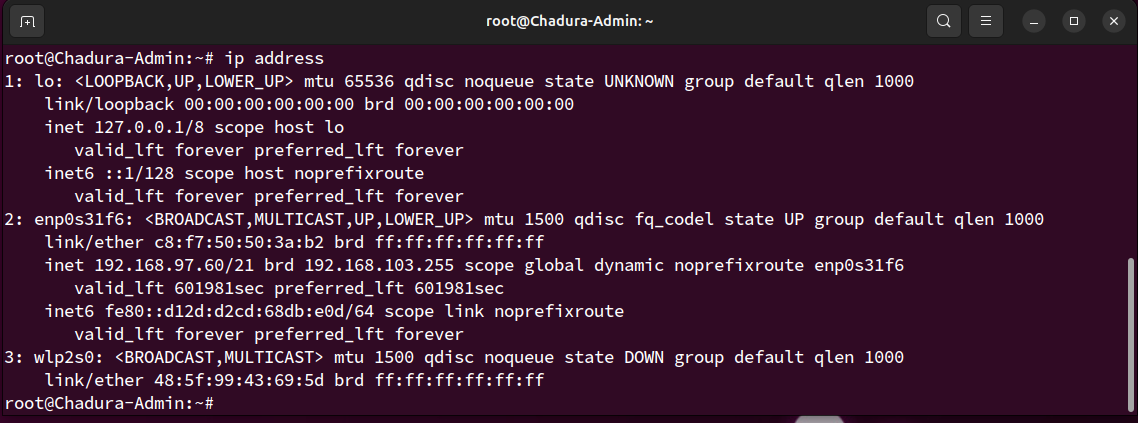
50. netstat
The netstat command displays information about your system’s network configuration. The syntax is simple:
netstat [options]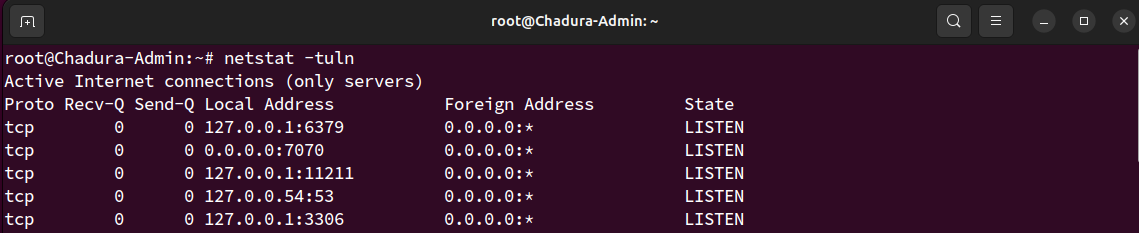
Add an option to query specific network information. Here are several flags to use:
-a - displays listening and closed sockets.
-t - shows TCP connections.
-u - lists UDP connections.
-r - displays routing tables.
-i - shows information about network interfaces.
-c - continuously outputs network information for real-time monitoring.
51. traceroute
The traceroute command tracks a packet’s path when traveling between hosts, providing information like the transfer time and involved routers. Here’s the syntax:
traceroute [options] destination
You can use a hostname, domain name, or IP address as the destination. If you don’t specify an option, traceroute will run the test using the default settings.
Change the maximum packet hops using the -m option. To prevent traceroute from resolving IP addresses, add -n.
You can also enable a timeout in seconds using the -w flag followed by the duration.
52. nslookup
The nslookup requests a domain name system (DNS) server to check a domain linked to an IP address or vice versa. Here’s the syntax:
nslookup [options] domain-or-ip [dns-server]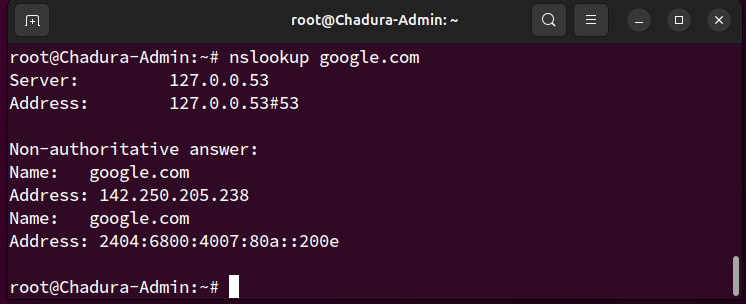
If you don’t specify a DNS server, nslookup will use your internet service provider’s default resolver. You can add other options to change how this command queries an IP address or a domain.
For example, use the -type= option to specify the information you want to check, such as the DNS records.
You can also set up automatic retry with the -retry= flag and add -port= to use a specific port.
Since some Linux distros don’t have this utility pre-installed, you might encounter the “command not found” error. You can configure it by downloading bind-utils or dnsutils via your package manager.
53.dig
The domain information groper or dig command displays information about a domain. It is similar to nslookup but more comprehensive. The syntax looks as follows:
dig [options] [server] [type] name-or-ip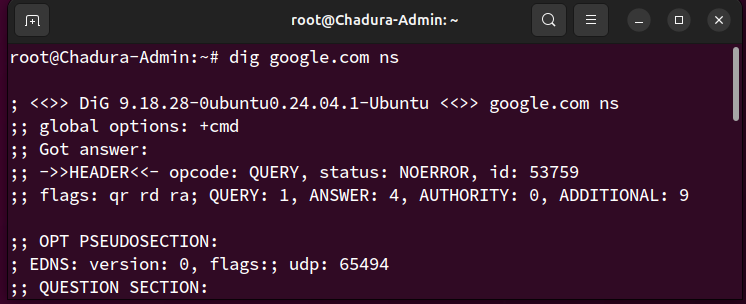
Running dig without an argument will check A records of the specified domain using the operating system’s default resolver. You can query a particular record by specifying it in the [type] argument like the following example:
dig MX domain.comTo run a reverse DNS lookup, add the - x option and use an IP address as the target.
54. history
Run the history command to check previously run utilities. Here’s its syntax:
history [options]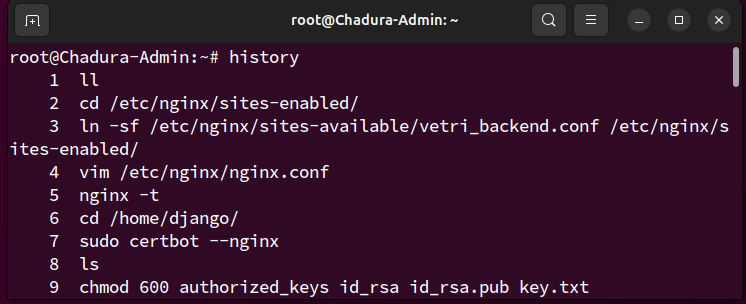
Add the -r option if you want to clear the Terminal history. To rerun a specific utility from the list, enter an exclamation mark followed by its ID.
55. man
The man or manual command displays a comprehensive guide of another utility. The syntax looks like the following:
man [options] [section_number] command_nameIf you specify only the command name, man will display the entire manual. Alternatively, you can select one of the nine sections using their IDs to print more specific information.
For example, run the following to check the library call section of the ls command’s manual:
man 3 ls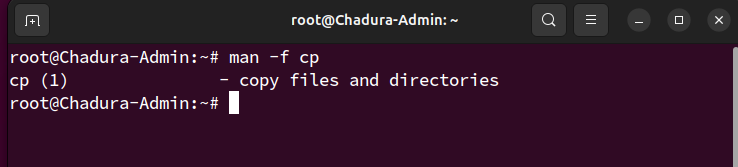
56. echo
Use echo to print text in your command as a Terminal output. Here’s the syntax:
echo [options] [text]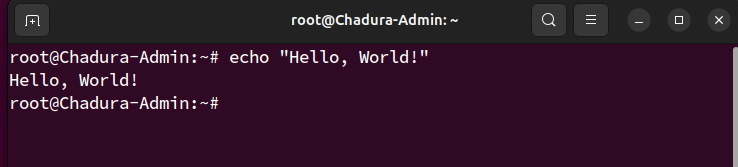
You can also add the redirection symbol (>) to print the text in a file instead of Terminal. If you use two symbols (>>), it will append the existing content. The command syntax looks like this:
echo [options] [text] > [file_name]If your text contains an environment or shell variable like $var, echo will display the actual value. This command is commonly used for testing and bash scripting.
57. ln
The ln command links files or directories with a shortcut. The syntax looks as follows:
ln [options] source targetThis command will automatically create the shortcut, meaning you don’t need to make one manually. For example, the following will enable you to open file.txt using shortcut.txt:
In target.txt shortcut.txt
By default, ln creates a hard link, meaning changes in the source will be reflected in the linked item and vice versa. To set up a soft or symbolic link, add the -s option.
58. alias and unalias
The alias command lets you set another name for a string that belongs to a file, text, program, or command name. Here’s the syntax:
alias name='string' 
For example, the following will assign k as the alias for the kill command, allowing you to use the letter instead of the full name.
alias k='kill'

To check a command’s alias, run the alias followed by an alternative name. For example, we will check the previous snippet: alias k
unalias
`unalias [name]59. cal
The cal command displays a calendar in your Linux command-line interface. Here’s the syntax:
cal [options] [month] [year]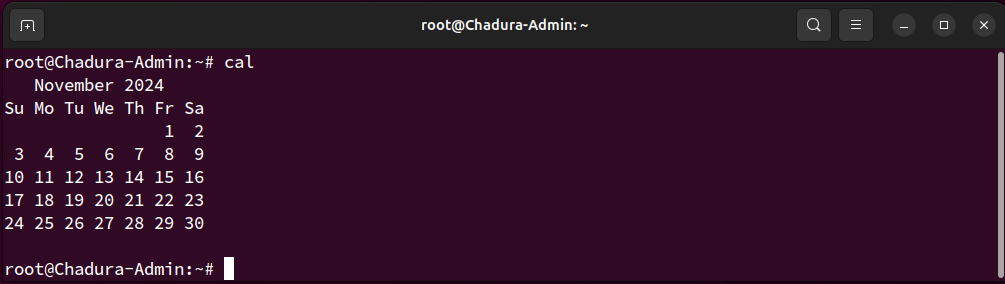
If you don’t add any argument, the command will show the current date. Alternatively, you can enter a specific month and year in a numerical format.
You can also add the -3 option to show the current, previous, and next month.
60. apt and dnf
The apt command lets you manage advanced package tool (APT) libraries in Debian-based operating systems such as Ubuntu and Kali Linux. The syntax looks like this:
apt [options] subcommandThe subcommands define the action, like updating the library, upgrading software, installing an application, or removing a package. For example, we will install the Vim text editor:
apt install vim